
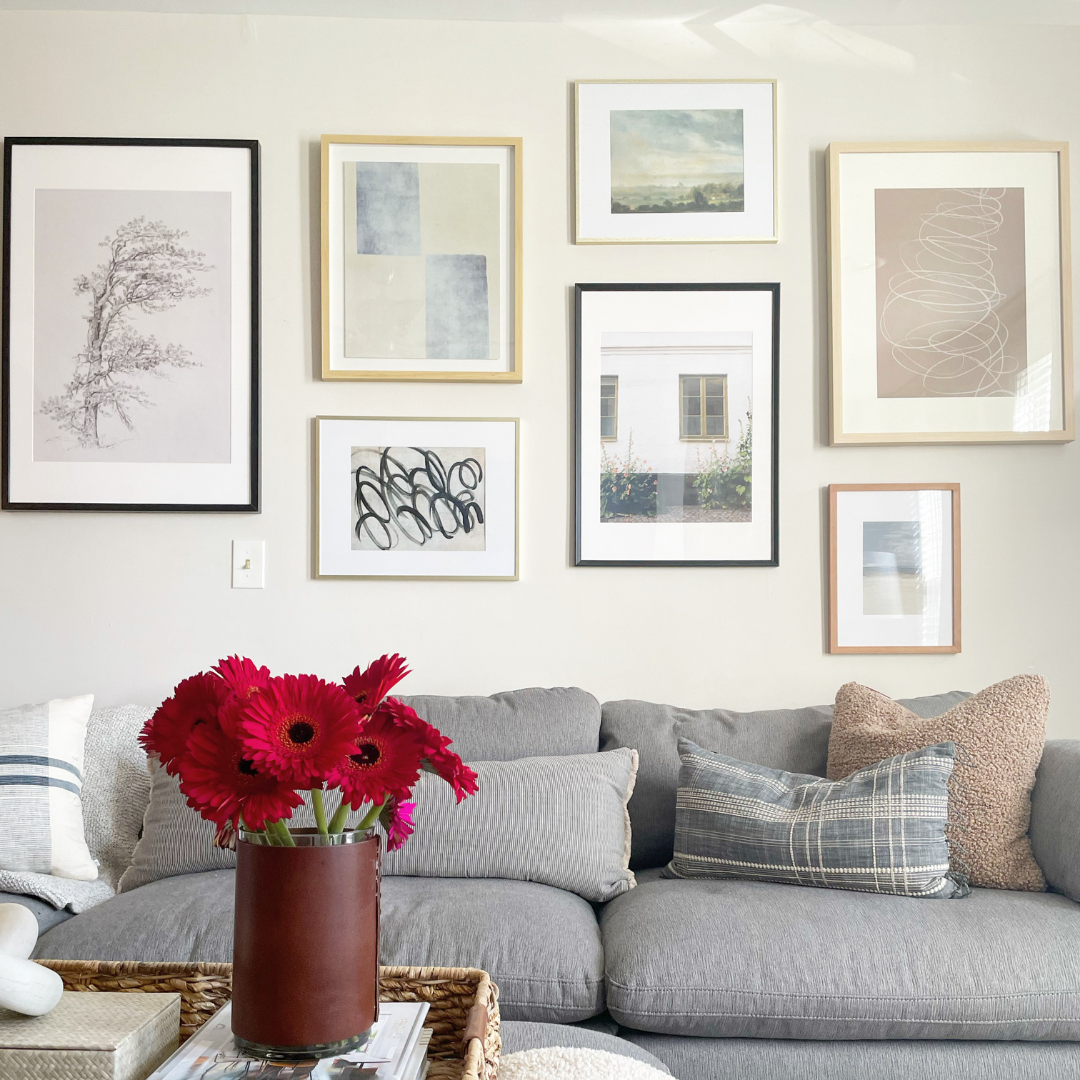
5 Steps to a Gallery Wall
Confession: I have had a frame on my wall with the original stock photo that came with the frame in it since we moved in. #designfail! It shows the barcode and everything. I am not proud of this. In fact, I have had people comment on the image saying “wow that is a nice picture of you dancing” and my response is usually, “wow, thank you, yes that was a good time.”
Unfortunately I don’t have a great excuse other than I am so indecisive of what art to choose to put in the frames. There are so many beautiful images and art pieces out there that I just couldn’t make a decision. If you are smart enough to believe this excuse…I will stick with it. Don’t let my indecisiveness scare you. Creating a Gallery Wall is actually so much fun and can be an expression of who you are. Although a Gallery Wall will have multiple pieces of art, it will all flow together to create one big statement piece for your room.
Creating a Gallery Wall sounds so simple but there are many complexities that come with it. Because of this, I have created a 5 Step workflow that will help you get started on your next Gallery Wall installation.
Whether it’s above a couch, above your bed, going up your stairs or simply an empty wall that needs some extra love, these steps will help guide you in the right direction.
Let’s get started!

Step 1: Get Inspired

Before starting any project, I find that getting inspired helps me truly develop what I want to get out of each project. You can get inspired by anything– a specific color caught your eye at the park or the texture of something intrigued you. You might also find inspiration in other’s work. For example, maybe you love the mood and feeling a photo gave you. Inspiration is all around you. Find what makes your senses go and make it come to life in your Gallery Wall.
Check out my Gallery Wall Pinterest Board to get started!
Step 2: Select your Art
Grab some wine- we are doing this thing! Selecting pieces of art can be so intimidating if you don’t know what you are looking for and/or don’t know where to look. My first piece of advice is to shop your house for art you already have. Secondly, if you are using family photos, choose photos that bring back great memories and are inclusive of all members in the household. Next, if you are buying art or photo prints, choose art that creates the mood you want the room to bring. For example, if it is for your bedroom, you will want to choose art that brings you a sense of calmness. If it’s a kids playroom, it will want to be joyful and cheerful. Just remember, nothing has to be permanent! You can always refresh your art throughout the seasons.
Tip: Gather all of your art or prints together in one place to make sure all the colors flow together nicely. Then pick your favorites! If you are purchasing art prints from an online shop, you can screenshot them and add to a PowerPoint page (example below!)
Where I buy my wall art from: Target, Home Goods, TJ Maxx, West Elm, Urban Outfitters
Where I buy art prints from online: Etsy, Collection Prints, Juniper Prints, Iamfy.com
Where I get my Photos Printed: Walmart.com, Collage.com, Walgreens, Costco

Step 3: Create a Layout Plan

Now that we are feeling inspired & know what pieces of art we are choosing, let’s now gather all of your ideas to pen and paper (or screenshot into PowerPoint). Start drawing out how you want your frame placement to look like . Drawing your layout plan can help you visual how you want it to look.
Things to Think About:
- How big is your gallery wall?
- How many frames will you need?
- How big or small will your frames be?
- If you have preexisting images or frames you will be using, what size are they? (You will need to build off of them)
- Do you want the frames to be in unison & in a straight line OR do you want them to look like they are randomly placed?
Swipe below to get some layout ideas!
Step 4: Pick your Frames
The layout you created in the previous step will help you determine the frame sizes you want to use. There are so many different types of frames. There are modern frames, antique frames, colorful frames, old frames, new frames, etc. The frame is just as important as the image you put inside of it. You might choose to go all one color in frames or perhaps you want them all to be different. Use your inspiration to help you determine what style you want.
Here are some of the places I purchased my frames from:
- Target
- Ikea
- Crate & Barrel
- Amazon
Step 5: Hang Away!
We are almost there! The last step is to hang your frames up according to your layout plan. Sounds easy right? While hanging, I suggest pulling out your inspiration again. Remind yourself of what you want your Gallery Wall to look like & make it happen!
Tips:
- Lay the frames out on the floor before hanging. Rearrange until you feel good about the layout. Sometimes things don’t go as you envisioned and that’s ok! Don’t be afraid to change it up!
- Cut out paper the size of your frames and tape the paper to your wall to visualize how it will come together. You can also use contractors blue tape!
- Use a level to make sure your frames are hung straight! (this is the hardest part!)
- Get detailed by measuring out the length from where the nail will need to go to the top & sides of the frames.
- Start with the biggest frame/ piece of art and build around it. Try placing your frames about 2-3 inches apart. You don’t want them to be too close but also don’t want them to be too far away.
- Don’t be afraid to stop & revaluate. If you don’t like it, change it!
Congratulations! You now have a beautiful Gallery Wall I am confident you and your guests will love! I’ll say it over and over, the entire Gallery Wall is a piece of art. It should reveal a story about yourself within each image.
Happy Gallery Wall Making!